

Arch Linux stands as a beacon of customization in the Linux universe, attracting seasoned tech enthusiasts with its promise of granular control and optimization. It is no surprise that when it comes to advanced data recovery techniques, Arch Linux emerges as a powerful tool in the hands of those who know how to wield it. By leveraging its rolling-release system, users can access the latest software tools that are essential for recovering critical data from failing or compromised storage devices.
Why Choose Arch Linux for Data Recovery?
With its minimalist approach, Arch Linux provides a lightweight environment that is perfect for dedicating system resources to data recovery tasks. Unlike other distributions that come pre-loaded with a plethora of applications, Arch allows users to install only what they need, thereby reducing the risk of software conflicts and ensuring a stable recovery process. For those looking to delve into data recovery on Linux, Arch's cutting-edge nature and vast repository of tools make it an optimal choice.
Setting Up Your Recovery Environment
Before embarking on your data recovery journey with Arch Linux, it's crucial to set up an environment conducive to success. This involves ensuring your hardware meets Arch Linux's system requirements, as well as following a step-by-step guide to prepare your PC. Once you're set up, you can begin installing the necessary tools from the vast selection available in the Arch User Repository (AUR), which hosts many specialized data recovery applications.
Step-by-Step Guide to Setting Up Arch Linux for Data Recovery


Advanced Data Recovery Tools Available on Arch
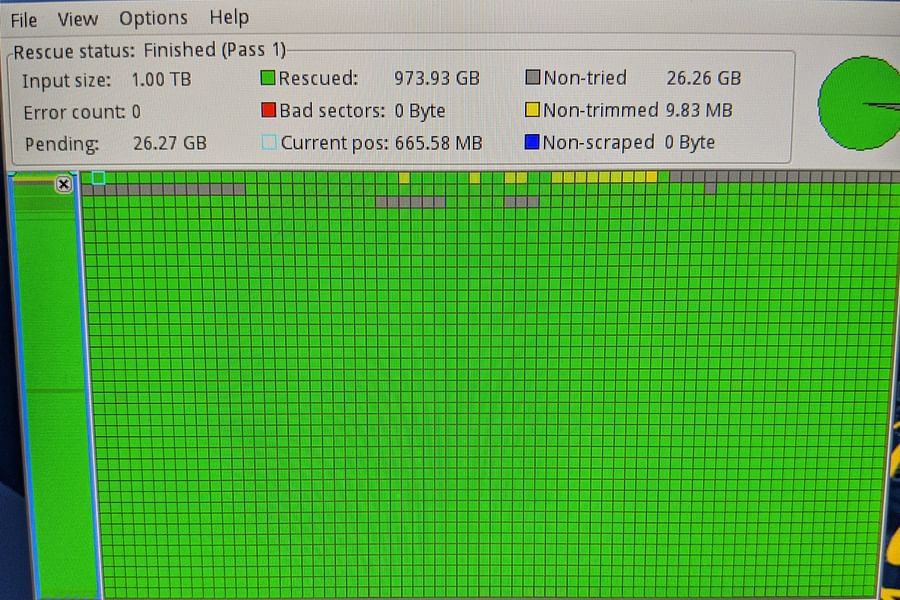
The beauty of Arch lies in its AUR – a treasure trove of software where one can find advanced tools such as TestDisk and PhotoRec, which are quintessential for recovering lost partitions and files. For more sophisticated needs, there are tools like ddrescue that help clone data from failing drives with precision. By harnessing these powerful utilities within Arch's ecosystem, tech gurus can approach complex recovery scenarios with confidence.
Top AUR Data Recovery Tools
- TestDisk - A powerful free data recovery software designed to help recover lost partitions and/or make non-booting disks bootable again.
- PhotoRec - Companion program to TestDisk, PhotoRec is file data recovery software designed to recover lost files including video, documents, and archives from hard disks.
- R-Linux - A free software for Debian/Ubuntu and Fedora/Redhat Linux platforms designed for recovering files from Ext2/Ext3/Ext4 FS partitions.

- DDRescue-GUI - A user-friendly graphical interface for the popular ddrescue command line tool, which provides a straightforward method to recover data.
- Foremost - A console program to recover files based on their headers, footers, and internal data structures, useful for recovering data from a variety of file systems.

- Scalpel - A fast file carver that reads a database of header and footer definitions and extracts matching files from a set of image files or raw device files.
In addition to these specialized tools, understanding and implementing security best practices is vital when handling sensitive data during the recovery process. Moreover, customizing your workspace plays a significant role in enhancing productivity; hence why many turn to guides on customizing the Arch desktop for an optimized experience.
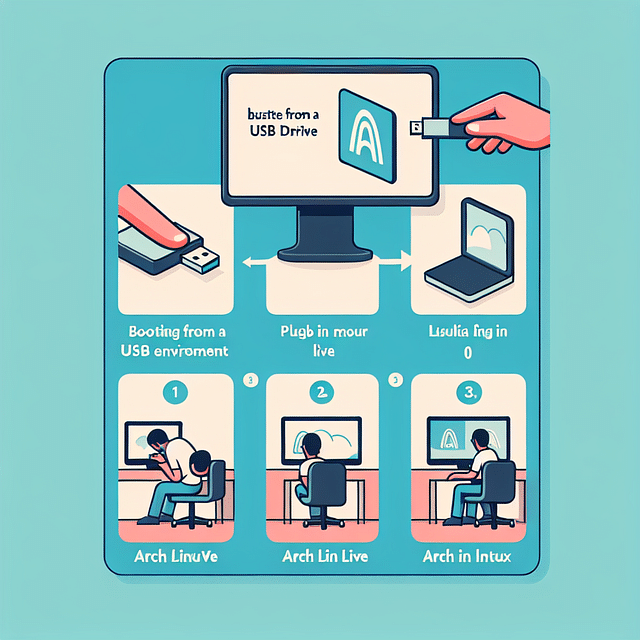
Leveraging Live Environments for Non-Invasive Recovery
An often overlooked yet powerful feature of using Arch for data recovery is the ability to run live environments directly from USB drives or other removable media. This non-invasive method ensures that no additional writes are made to the affected storage device, preserving its state and preventing further damage. By booting into a live system, one can perform diagnostics and recoveries without risking additional loss.
To truly master advanced data recovery techniques on this platform requires not only knowledge but also practice. Therefore, exploring comprehensive guides like "From Zero to Hero: A Comprehensive Guide to Arch Linux for Cybersecurity" or "The 2022 Guide to Customizing Your Arch Linux Desktop for Enhanced Productivity" will equip you with valuable insights into utilizing this versatile OS at its fullest potential.
In subsequent sections, we will dive deeper into specific advanced techniques that can be employed using these tools and illustrate how they can be leveraged in real-world scenarios where every byte of lost data counts.
Mastering TestDisk on Arch Linux for File Recovery
When it comes to advanced data recovery, one cannot overlook the power of TestDisk. This mighty tool is a free and open-source data recovery software that can help you recover lost partitions and make non-booting disks bootable again. Its effectiveness in dealing with software faults, human error, virus attacks, or filesystem corruption is unparalleled. On Arch Linux, TestDisk operates through the command line, offering a granular control over the data recovery process that GUI-based tools often lack.
To get started with TestDisk on Arch Linux, ensure you have it installed by running pacman -S testdisk. Once installed, launching TestDisk will present you with a step-by-step procedure to select your disk and the type of partition table it has. The tool then allows you to scan for lost partitions or repair a damaged filesystem. For those who are new to this application or need a refresher, I recommend watching an instructional video.
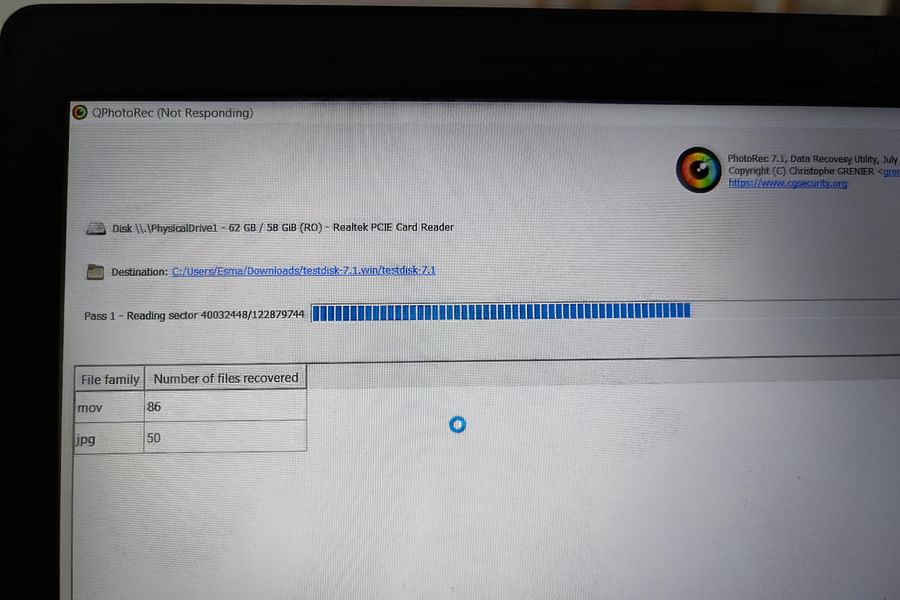
Recovering Data with Photorec
Another powerful component in your Arch Linux data recovery toolkit is Photorec. It's designed to recover lost files including videos, documents, and archives from hard disks and CD-ROMs. Its robustness stems from its ability to ignore the filesystem and go after the underlying data directly, which makes it an excellent choice when the filesystem is severely damaged or reformatted.
Photorec works alongside TestDisk but focuses specifically on file recovery. It supports a vast array of file formats and systems, ensuring that no matter how obscure your lost files are, there's a good chance Photorec can retrieve them. For those who wish to understand how Photorec performs its magic on Arch Linux systems, an interactive guide can be immensely helpful.
[step_by_step_guide: An interactive guide on using Photorec for file recovery on Arch Linux]Leveraging System Rescue Tools
In addition to specialized tools like TestDisk and Photorec, Arch Linux users have access to comprehensive system rescue distributions that can be indispensable in emergency situations. One such distribution is SystemRescueCd, which provides a suite of tools for repairing damaged systems and recovering data. It includes filesystem tools, disk management tools like GParted, as well as network utilities for securing necessary files across the network.
This bootable CD-ROM or USB stick for administrating or repairing your system and data after a crash contains essential tools like GNU Parted and NTFS-3G that support various filesystems. Understanding how to effectively use these tools within an Arch environment can make all the difference when facing catastrophic data loss scenarios.
To further enhance your proficiency in utilizing these advanced recovery techniques on Arch Linux systems, consider delving into our comprehensive guides such as Arch Linux security best practices, customizing your desktop experience, or even troubleshooting tips at Arch Linux Troubleshooting Tips.
Achieving Data Recovery Proficiency on Arch Linux
Becoming proficient in advanced data recovery techniques on Arch Linux takes time and practice. It involves understanding the intricacies of your system's hardware through resources like Arch Linux System Requirements, as well as gaining knowledge about file system structures and how they can become corrupted.
To solidify this knowledge into practical skills, it's beneficial to set up practice scenarios in safe environments where you can simulate data loss incidents without risking valuable information. Resources such as our comprehensive guide to Arch Linux for cybersecurity offer insights into maintaining system integrity while recovering from potential breaches.
In summary, leveraging the full potential of Arch Linux for advanced data recovery necessitates dedication to learning its powerful suite of tools. By combining knowledge from resources like customizing your desktop for productivity, with hands-on practice using essential tools like TestDisk and Photorec—and not forgetting the support provided by comprehensive rescue distributions—you'll be well-equipped to handle any data loss situation that comes your way.
What's Your Biggest Challenge with Advanced Data Recovery on Arch Linux?
Learning advanced data recovery techniques on Arch Linux can be a complex process. We're curious to know what part of this learning curve you find the most challenging. Share your experience with us!
Your journey doesn't end here; continue exploring our guides such as installing and configuring Arch Linux for cybersecurity or discovering other powerful Linux distros dedicated to data recovery. Your commitment to mastering these skills not only safeguards your own digital assets but also empowers you to assist others in protecting theirs—an invaluable skill set in today's digital age.


No comments yet. Be the first to share your thoughts!